Installing a Brocade | 3 |
Follow these steps to install a power supply in the router.
1.Remove the power supply slot blank and store if for future use.
2.Remove the power supply from the packaging.
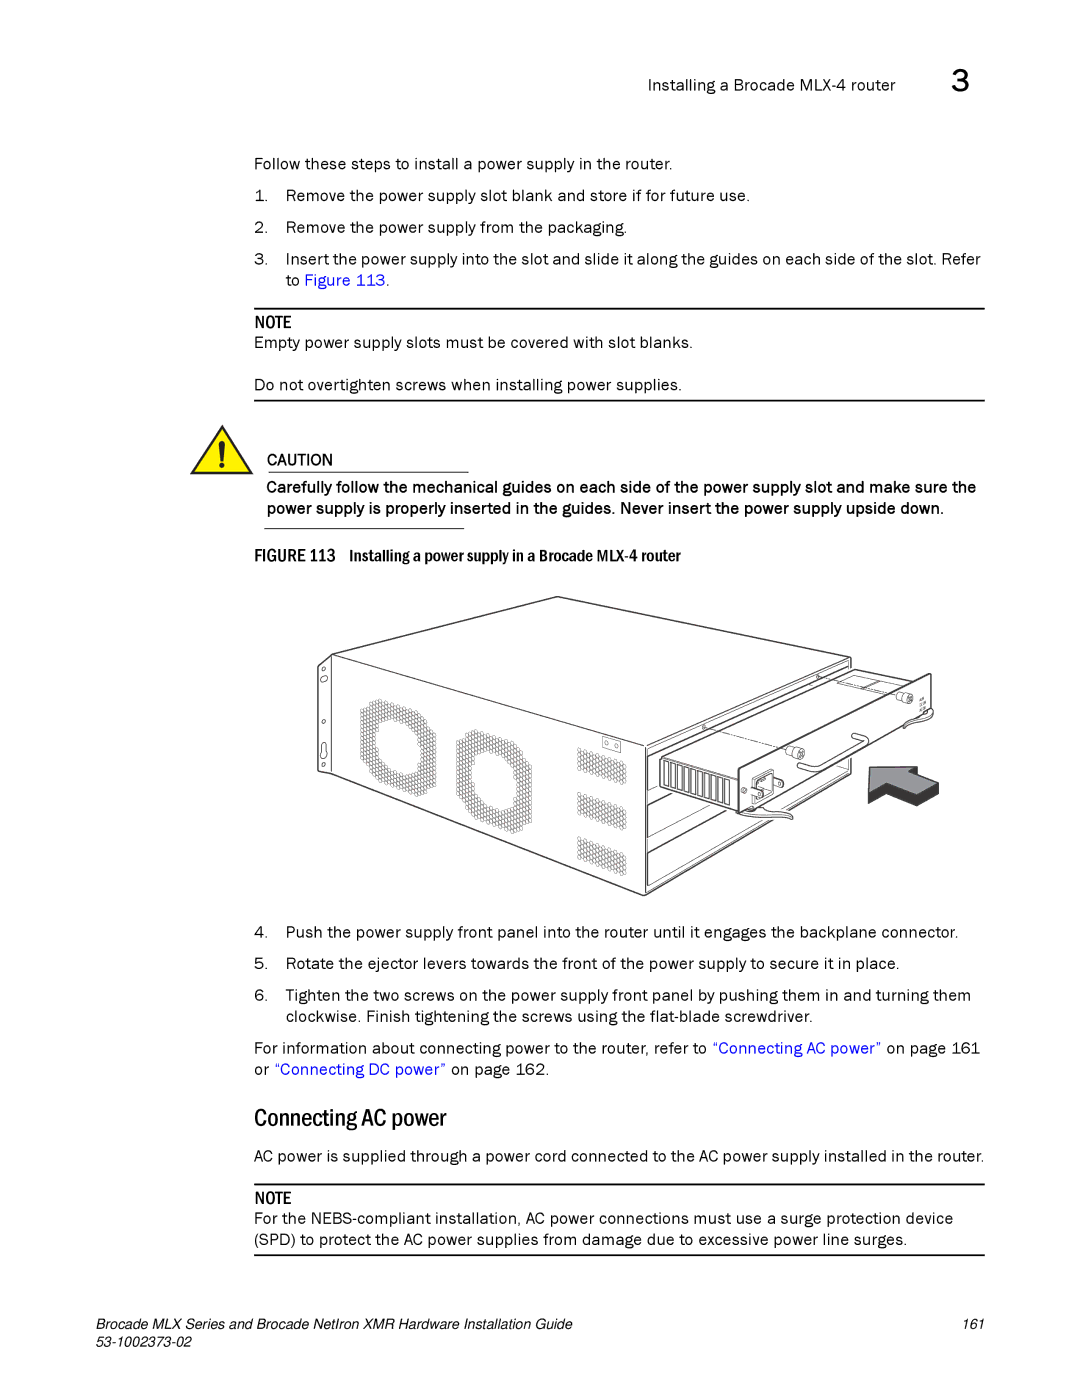
3.Insert the power supply into the slot and slide it along the guides on each side of the slot. Refer to Figure 113.
NOTE
Empty power supply slots must be covered with slot blanks.
Do not overtighten screws when installing power supplies.
CAUTION
Carefully follow the mechanical guides on each side of the power supply slot and make sure the power supply is properly inserted in the guides. Never insert the power supply upside down.
FIGURE 113 Installing a power supply in a Brocade MLX-4 router
4.Push the power supply front panel into the router until it engages the backplane connector.
5.Rotate the ejector levers towards the front of the power supply to secure it in place.
6.Tighten the two screws on the power supply front panel by pushing them in and turning them clockwise. Finish tightening the screws using the flat-blade screwdriver.
For information about connecting power to the router, refer to “Connecting AC power” on page 161 or “Connecting DC power” on page 162.
Connecting AC power
AC power is supplied through a power cord connected to the AC power supply installed in the router.
NOTE
For the
Brocade MLX Series and Brocade NetIron XMR Hardware Installation Guide | 161 |
|
|