Brocade Communications Systems 53-1002373-02 manual 200

Models: 53-1002373-02

1 452
Download 452 pages 21.42 Kb
Page 218
Image 218

3 Installing a Brocade MLX-32 router

Installing your 32-slot device in a 2-post rack or open cabinet

NOTE

Because of the weight of a fully-populated 32-slot chassis, it is not recommended that you install your 32-slot router in a 2-post rack or open cabinet. The preferred installation is in a 4-post rack or open cabinet. Refer to “Installing your 32-slot router in a 4-post rack or open cabinet” on page 205 for installation instructions

You can install your 32-slot device in a 2-post rack or open cabinet in either a front-mount configuration or a mid-mount configuration using the factory-installed mounting brackets. For a mid-mount configuration, simply remove the factory-installed mounting brackets from the front edges of the device and re-attach them to the center sides of the device using the pre-drilled holes.

Once you have completed the preliminary installation preparations (refer to “Preliminary rack mount installation steps” on page 199), complete the following steps to install your device in a 2-post rack or cabinet.

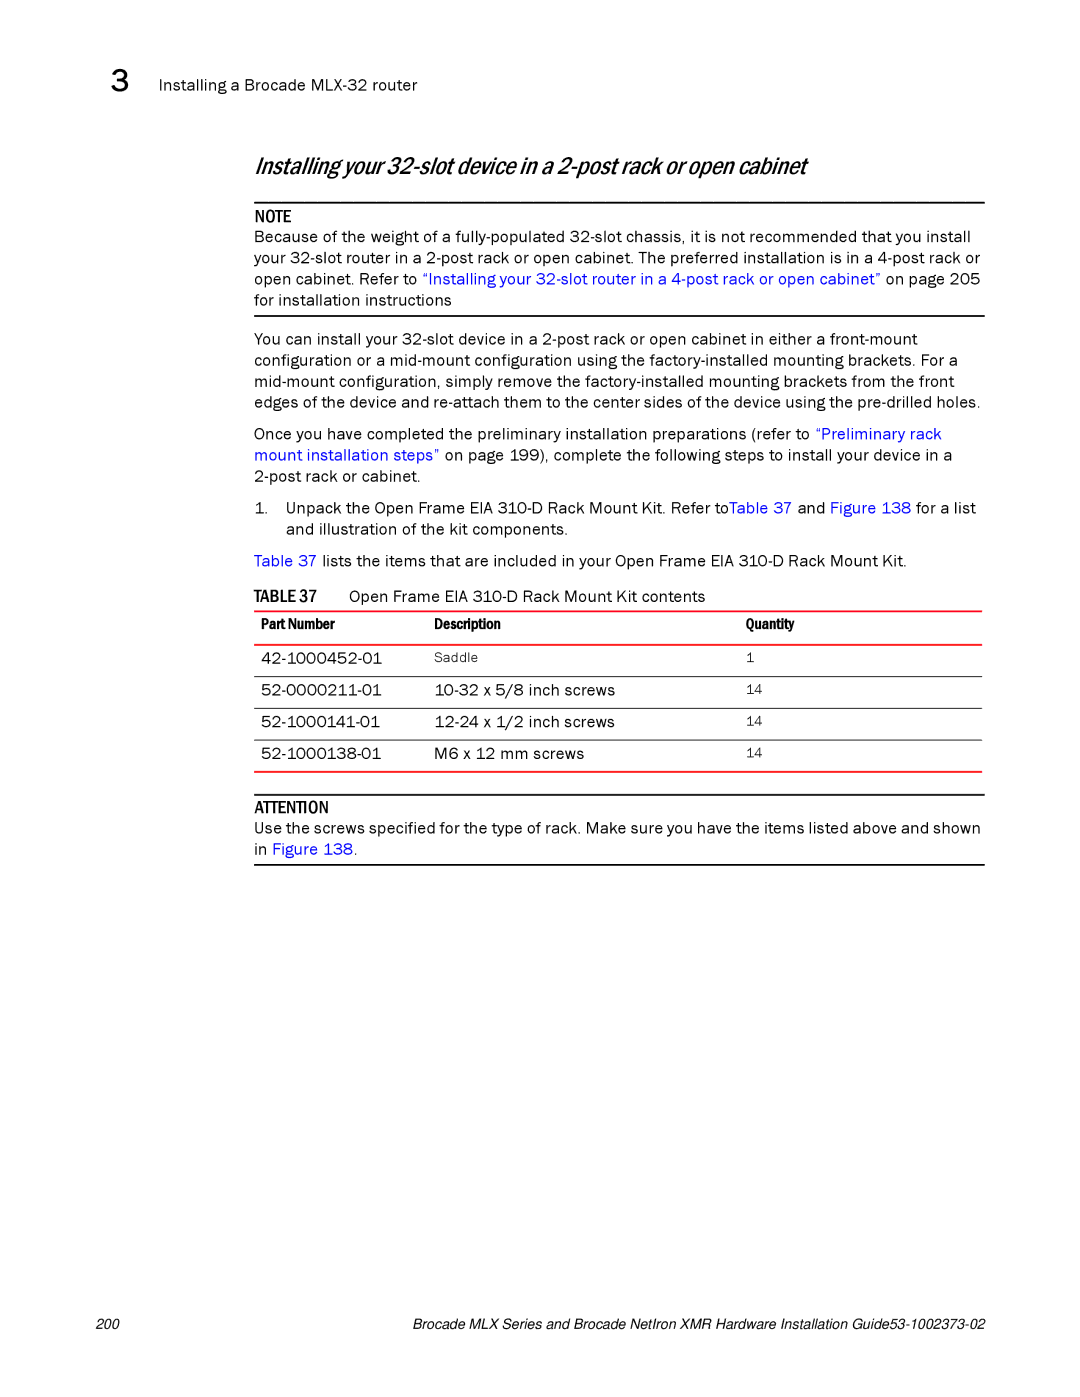
1.Unpack the Open Frame EIA 310-D Rack Mount Kit. Refer toTable 37 and Figure 138 for a list and illustration of the kit components.

Table 37 lists the items that are included in your Open Frame EIA 310-D Rack Mount Kit.

TABLE 37

Open Frame EIA 310-D Rack Mount Kit contents


Part Number


Description

Quantity


42-1000452-01

Saddle

1


52-0000211-01

10-32 x 5/8 inch screws

14


52-1000141-01

12-24 x 1/2 inch screws

14


52-1000138-01

M6 x 12 mm screws

14


ATTENTION

Use the screws specified for the type of rack. Make sure you have the items listed above and shown in Figure 138.

200

Brocade MLX Series and Brocade NetIron XMR Hardware Installation Guide53-1002373-02

Page 218
Image 218
Brocade Communications Systems 53-1002373-02 manual 200