cpk=pÉêáÉë
rëÉêÛë=dìáÇÉ
kçíáÅÉ
cpk=pÉêáÉë==√==rëÉêÛë=dìáÇÉ
`çéóêáÖÜí
cÉÇÉê~ä=`çããìåáÅ~íáçåë=`çããáëëáçå=Ec``F=pí~íÉãÉåí
• • •
`çãé~åó=^ÇÇêÉëë
qê~ÇÉã~êâë
Barco, Inc
mçïÉê=pçìêÅÉ
léÉê~íçêë=p~ÑÉíó=pìãã~êó
aç=kçí=oÉãçîÉ=`çîÉêë=çê=m~åÉäë
dêçìåÇáåÖ=íÜÉ=mêçÇìÅí
`^rqflk
qÉêãë=få=qÜáë=j~åì~ä=~åÇ=bèìáéãÉåí=j~êâáåÖ=
t^okfkd
^sboqfppbjbkq>
`Ü~åÖÉ=eáëíçêó
FSN Series • User’s Guide • Rev
`Ü~éíÉê=O
q~ÄäÉ=çÑ=`çåíÉåíë
`Ü~éíÉê=N
FSN Series • User’s Guide • Rev
`Ü~éíÉê=Q
Table of Contents
`Ü~éíÉê=P
FSN Series • User’s Guide • Rev
Table of Contents
FSN Series • User’s Guide • Rev
FSN Series • User’s Guide • Rev
Table of Contents
Understanding Sync Mode . . . . . . . . . . .
Table of Contents
FSN Series • User’s Guide • Rev
Table of Contents
`Ü~éíÉê=S
`Ü~éíÉê=T
FSN Series User’s Guide Rev
Table of Contents
FSN Series • User’s Guide • Rev
FSN Series • User’s Guide • Rev
Table of Contents
Joystick Control . . . . . . . . . . . . . . . . . . . . . . . . . . . . . . . . . . . . . . . . .
^ééÉåÇáñ=^=
`Ü~éíÉê=V
`Ü~éíÉê=NM
Table of Contents
FSN Series • User’s Guide • Rev
Table of Contents
Ethernet Connector . . . . . . . . . . . . . . . . . . . . . . . . . . . . . . . . . . . . . .
• • • • • • • • •
NK==fåíêçÇìÅíáçå
få=qÜáë=`Ü~éíÉê
Software Version
NK==fåíêçÇìÅíáçå
pçÑíï~êÉ=sÉêëáçå
`Ü~éíÉê=píêìÅíìêÉ
• • • • • • • • • • • •
`çåîÉåíáçåë=
SPress System > Input Setup to
eçï=íç=rëÉ=qÜáë=dìáÇÉ
k~îáÖ~íáåÖ
~ ~ ~ ~ ~
däçëë~êó=çÑ=pïáíÅÜÉê=qÉêãë=
• • • • •
• • • • • •
• • • •
Fader — see T-Bar
NK==fåíêçÇìÅíáçå
• • • • • •
FSN Series • User’s Guide • Rev
• • • • • • • • • • • • • • • •
NK==fåíêçÇìÅíáçå
lîÉêîáÉï
Overview Control Features System Configuration
^Äçìí=íÜÉ=cpk=pÉêáÉë
~ ~ ~ ~ ~ ~ ~ ~
FSN Series • User’s Guide • Rev
`çåíêçä=cÉ~íìêÉë
NK==fåíêçÇìÅíáçå
~ëáÅ=cpk=pÉêáÉë=póëíÉã
Optional Cards M/E Features
póëíÉã=`çåÑáÖìê~íáçå
oÉèìáêÉÇ=`~êÇë
NK==fåíêçÇìÅíáçå
léíáçå~ä=`~êÇë
jLb=cÉ~íìêÉë
• • •
kÉï=cÉ~íìêÉ=oÉîáÉï
•Version 3.0 Features
~New DVE Assign Menu, accessed via the Setup Menu
sÉêëáçå=PKM=cÉ~íìêÉë
•M/E 2 Control
•NIC Gamma Adjustment
~ ~ ~
Ancillary Data Support for SD Rates
•Menu Enhancements
•Feature Enhancements
•Additional Test Pattern
•Analog Format Connection Table — Correction
System 1 — Basic System 2 — Multiple Destinations
`çååÉÅíáîáíó=aá~Öê~ãë
póëíÉã=N=Ô=_~ëáÅ
NK==fåíêçÇìÅíáçå
• • •
póëíÉã=O=Ô=jìäíáéäÉ=aÉëíáå~íáçåë
NK==fåíêçÇìÅíáçå
FSN Series • User’s Guide • Rev
FSN Series • User’s Guide • Rev
^ééäáÅ~íáçå=nìÉëíáçåë
NK==fåíêçÇìÅíáçå
Analog Format Connection Table
OK==cpkJNQMM=lêáÉåí~íáçå
Hardware Description Card Descriptions Card LEDs
få=qÜáë=`Ü~éíÉê
2. FSN-1400Orientation
e~êÇï~êÉ=aÉëÅêáéíáçå
`Ü~ëëáë=lîÉêîáÉï
~ ~ ~ ~
Input Flexibility Auxiliary Output Flexibility
`~êÇ=päçí=^ääçÅ~íáçå=~åÇ=póëíÉã=cäÉñáÄáäáíó
fåéìí=cäÉñáÄáäáíó
2. FSN-1400Orientation
FSN Series • User’s Guide • Rev
^ìñáäá~êó=lìíéìí=cäÉñáÄáäáíó
2. FSN-1400Orientation
2System Status LEDs
`Ü~ëëáë=cêçåí=aççê
1Door Latch
2. FSN-1400Orientation
3Hinges
^áê=cáäíÉê
aççê=oÉãçî~ä=~åÇ=oÉJáåëí~ää~íáçå
2. FSN-1400Orientation
DC OK LED
1Power Supplies
`Ü~ëëáë=cêçåí
AC OK LED
4Aux and MVR Card Slots
2Fan Tray
3System Card Slot
5DVE Card Slots
2Input Card Panels
`Ü~ëëáë=oÉ~ê
1Air Vents
2. FSN-1400Orientation
4DVE Blank Panel
7AC Power
3M/E Card Panel
5Aux and MVR Output Card Panels
System Card M/E Card Native Input Card
`~êÇ=aÉëÅêáéíáçåë
• • • • • • • • • •
Universal Input Card Digital Video Effects Card
9 10 11 12 13
póëíÉã=`~êÇ
1 4 6
14 15
6Diagnostic Port
1System Power LED
4Card Power LED
7CPU Reset Switch
10 Ethernet Port
8IP Address Reset Switch
9Serial Ports
11Ref In
12Loop
14Tally Connector
15GPIO Connector
13Ref Out
2. FSN-1400Orientation
cpk=pÉêáÉë=bíÜÉêåÉí=`çååÉÅíáçåë
FSN-1400
~ ~ ~
10 11 12
jLb=`~êÇ
1 2 1
4 13 14 15
9M/E 1 Clean Feed Out
2Card Power LED
6Clean Feed Out
12M/E 2 Clean Feed Out
15Native Aux Outputs
13DSK Cut In
14DSK Fill in
2. FSN-1400Orientation
FSN Series • User’s Guide • Rev
`äÉ~å=cÉÉÇ=lìíéìí=pÉäÉÅíáçå
2. FSN-1400Orientation
1Ejectors
k~íáîÉ=fåéìí=`~êÇ
2. FSN-1400Orientation
FSN Series • User’s Guide • Rev
2. FSN-1400Orientation
4Native Inputs 1 -
2Card Power LED
3Loaded LED
1 2 1
råáîÉêë~ä=fåéìí=`~êÇ
2. FSN-1400Orientation
1Ejectors
2Card Power LED
4Universal Input
5Universal Input
2. FSN-1400Orientation
FSN Series • User’s Guide • Rev
aáÖáí~ä=sáÇÉç=bÑÑÉÅíë=`~êÇ
2. FSN-1400Orientation
2. FSN-1400Orientation
råáîÉêë~ä=lìíéìí=`~êÇ
2Card Power LED
1 2 1
5Universal Output
4Universal Output
1x DVI-I 1x BNC
2. FSN-1400Orientation
• • •
k~íáîÉ=^ìñ=lìíéìí=`~êÇ
2. FSN-1400Orientation
1 2 1
2. FSN-1400Orientation
4Native Aux Outputs
2Card Power LED
1Ejectors
2Card Power LED
jìäíáîáÉïÉê=`~êÇ
4 5 6
2. FSN-1400Orientation
6LTC Input
4MVR Output
5MVR Output
2. FSN-1400Orientation
2Loaded LED
1Card Power LED
`~êÇ=ibaë
2. FSN-1400Orientation
FSN Series • User’s Guide • Rev
^å~äçÖ=cçêã~í=`çååÉÅíáçå=q~ÄäÉ
2. FSN-1400Orientation
2. FSN-1400Orientation
FSN Series • User’s Guide • Rev
Control Panel Descriptions Control Panel Rear
Control Panel Bottom Touch Screen Connector Panel
PK==`çåíêçä=m~åÉä=lêáÉåí~íáçå
få=qÜáë=`Ü~éíÉê
3. Control Panel Orientation
`çåíêçä=m~åÉä=aÉëÅêáéíáçåë
cpkJNRM=lîÉêîáÉï
FSN-150Overview FSN-150Control Panel Sections
3. Control Panel Orientation
FSN Series • User’s Guide • Rev
9 5 3
cpkJNRM=`çåíêçä=m~åÉä=pÉÅíáçåë
7 6 4 2
1Display Section
5M/E Transition Section
3PGM Transition Section
4M/E Bank
6Aux Section
M/E Bank M/E Transition Section Aux Section
cìåÅíáçå~ä=`çåíêçä=m~åÉä=pÉÅíáçåë
Display Section PGM Bank PGM Transition Section
Custom Control Section Memory Section Joystick
2Knobs
aáëéä~ó=pÉÅíáçå
1Touch Screen
3. Control Panel Orientation
3. Control Panel Orientation
mdj=_~åâ
1Programmable Displays
• • •
5SHIFT Buttons
2Program Bus
4Re-entryButtons
3. Control Panel Orientation
3. Control Panel Orientation
mdj=qê~åëáíáçå=pÉÅíáçå
1PGM Transition Display
FSN Series User’s Guide Rev
3. Control Panel Orientation
2T-Barand Transition LEDs
3Next Transition Group
FSN Series • User’s Guide • Rev
FSN Series • User’s Guide • Rev
3. Control Panel Orientation
Control Panel Descriptions For example
6Auto Transition
4Effects Group
5Cut
3. Control Panel Orientation
FSN Series • User’s Guide • Rev
7FTB
3. Control Panel Orientation
3. Control Panel Orientation
jLb=_~åâ
1 2 3 4
1Programmable Displays
3Background Bus
4Preset Bus
2Key Bus
5Key Control Section
3. Control Panel Orientation
jLb=qê~åëáíáçå=pÉÅíáçå
1M/E Transition Display
FSN Series • User’s Guide • Rev
2T-Barand Transition LEDs
•AUTO TRAN •MIX KEY 1 and MIX KEY
3. Control Panel Orientation
FSN Series • User’s Guide • Rev
FSN Series • User’s Guide • Rev
3. Control Panel Orientation
3Next Transition Group
4Effects Group
3. Control Panel Orientation
Control Panel Descriptions
FSN Series • User’s Guide • Rev
FSN Series • User’s Guide • Rev
display the Transition Menu
3. Control Panel Orientation
5Cut
AUTO TRAN
3. Control Panel Orientation
6Auto Transition
Figure 3-17. Direct Key Control Group
7Direct Key Control Group
FSN Series • User’s Guide • Rev
FSN Series • User’s Guide • Rev
3. Control Panel Orientation
Control Panel Descriptions
3. Control Panel Orientation
^ìñ=pÉÅíáçå
1Aux Output Row
FSN Series • User’s Guide • Rev
3. Control Panel Orientation
2Aux Source Row
3Assignable Source
FSN Series User’s Guide Rev
1Custom Control Displays
`ìëíçã=`çåíêçä=pÉÅíáçå
FSN-150
2Custom Control Buttons
1Memory Display
jÉãçêó=pÉÅíáçå
1 2 3
3. Control Panel Orientation
3. Control Panel Orientation
2Function Section
3Module Section
FSN Series • User’s Guide • Rev
3. Control Panel Orientation
STORE or RECALL button
4Keypad
FSN Series • User’s Guide • Rev
3. Control Panel Orientation
FSN Series • User’s Guide • Rev
FSN Series • User’s Guide • Rev
gçóëíáÅâ
3. Control Panel Orientation
`çåíêçä=m~åÉä=oÉ~ê=
1Light Connectors
5VGA Connector
2Mouse Port
11DC Power Out
6DVI Connector
7CPU Switch
12Audio Connectors
3. Control Panel Orientation
1Access Plate
`çåíêçä=m~åÉä=_çííçã
FSN Series • User’s Guide • Rev
qçìÅÜ=pÅêÉÉå=`çååÉÅíçê=m~åÉä
2DVI Connector
3DC Power In
1USB Port
Touch Screen Installation Display Mount Options
Safety Precautions Shipping Information
Control Panel Installation
FSN-1400 Rack-MountProcedure
pÜáééáåÖ=fåÑçêã~íáçå
4. Installation
p~ÑÉíó=mêÉÅ~ìíáçåë=
råé~ÅâáåÖ=~åÇ=fåëéÉÅíáçå=
cpkJNQMM=`~ÄäÉë
páíÉ=mêÉé~ê~íáçå=
`~ÄäÉ=~åÇ=^Ç~éíÉê=fåÑçêã~íáçå
cpkJNRM=`~ÄäÉë
FSN Series • User’s Guide • Rev
`çåíêçä=m~åÉä=fåëí~ää~íáçå
4. Installation
FSN Series • User’s Guide • Rev
qçìÅÜ=pÅêÉÉå=fåëí~ää~íáçå
4. Installation
FSN Series • User’s Guide • Rev
4. Installation
Touch Screen Installation
• • • • •
aáëéä~ó=jçìåí=léíáçåë
4. Installation
FSN Series • User’s Guide • Rev
4. Installation
cpkJNQMM=o~ÅâJjçìåí=mêçÅÉÇìêÉ
• • • • • • •
FSN Series User’s Guide Rev
4. Installation
FSN Series • User’s Guide • Rev
FSN Series • User’s Guide • Rev
cpkJNQMM=póëíÉã=`çååÉÅíáçåë
4. Installation
4. Installation
FSN Series • User’s Guide • Rev
FSN Series • User’s Guide • Rev
4. Installation
FSN-1400System Connections
Warnung
mçïÉê=`çêÇLiáåÉ=sçäí~ÖÉ=pÉäÉÅíáçå
Avertissement
4. Installation
Card Insertion Card Removal
`~êÇ=~åÇ=oÉ~ê=m~åÉä=fåëí~ää~íáçå
Rear Panel Insertion Rear Panel Removal
4. Installation
~ ~ ~ ~ ~ ~
oÉ~ê=m~åÉä=fåëÉêíáçå
oÉ~ê=m~åÉä=oÉãçî~ä
4. Installation
FSN Series • User’s Guide • Rev
`~êÇ=fåëÉêíáçå
4. Installation
4. Installation
FSN Series • User’s Guide • Rev
FSN Series • User’s Guide • Rev
`~êÇ=oÉãçî~ä
4. Installation
External DSK Input Connections
páÖå~ä=`çååÉÅíáçåë
Output Connections Aux Output Connections
Native Input Connections
FSN Series User’s Guide Rev
lìíéìí=`çååÉÅíáçåë
4. Installation
4. Installation
FSN Series • User’s Guide • Rev
FSN Series • User’s Guide • Rev
^ìñ=lìíéìí=`çååÉÅíáçåë
4. Installation
FSN Series • User’s Guide • Rev
bñíÉêå~ä=aph=fåéìí=`çååÉÅíáçåë
4. Installation
FSN Series • User’s Guide • Rev
k~íáîÉ=fåéìí=`çååÉÅíáçåë
4. Installation
FSN Series • User’s Guide • Rev
råáîÉêë~ä=fåéìí=`çååÉÅíáçåë
4. Installation
• • • •
å~äçÖ=cçêã~í=`çååÉÅíáçå=q~ÄäÉ
4. Installation
FSN Series • User’s Guide • Rev
FSN Series • User’s Guide • Rev
jìäíáîáÉïÉê=`çååÉÅíáçåë
4. Installation
4. Installation
FSN Series • User’s Guide • Rev
Using the Pop-upKeyboard Transition Menu
Menu Tree Using the Menu System
Buttons, Tables and Matrices Using the Keypad
RK==jÉåì=lêáÉåí~íáçå
5. Menu Orientation
jÉåì=qêÉÉ
eáÖÜ=iÉîÉä=jÉåì=qêÉÉ
High Level Menu Tree System Menu Tree
FSN Series • User’s Guide • Rev
póëíÉã=jÉåì=qêÉÉ
5. Menu Orientation
Figure 5-2. FSN Series System Menu
2Prompt Bar
rëáåÖ=íÜÉ=jÉåì=póëíÉã
1Title Bar
5. Menu Orientation
Keys
3Palette
4Menu Bar
SPage 1 of SPage 2 of 5Tool Bar
_ìííçå=`~íÉÖçêáÉë=~åÇ=`çäçêë
Matrices Notes and Error Messages
_ìííçåëI=q~ÄäÉë=~åÇ=j~íêáÅÉë
Button Categories and Colors
•Momentary
i~íÅÜáåÖI=jçãÉåí~êó=~åÇ=`çåÇáíáçå~ä=_ìííçåë
•Latching
5. Menu Orientation
•Conditional
s~äìÉ=_ìííçåë
qçÖÖäÉ=_ìííçåë
5. Menu Orientation
5. Menu Orientation
mçéJìé=_ìííçåë
içÅ~íáçå=_ìííçåë
FSN Series • User’s Guide • Rev
FSN Series • User’s Guide • Rev
5. Menu Orientation
Buttons, Tables and Matrices
FSN Series • User’s Guide • Rev
pìãã~êó=çÑ=_ìííçå=qóéÉë
5. Menu Orientation
FSN Series • User’s Guide • Rev
q~ÄäÉë
5. Menu Orientation
Menu Title
j~íêáÅÉë
kçíÉë=~åÇ=bêêçê=jÉëë~ÖÉë
5. Menu Orientation
1Function Bar
rëáåÖ=íÜÉ=hÉóé~Ç
1 3 4 5
2Register
6Close
3Backspace
4Numerics
7Undo
12Decimal
10Trim +
11Enter
5. Menu Orientation
FSN Series • User’s Guide • Rev
rëáåÖ=íÜÉ=mçéJìé=hÉóÄç~êÇ
5. Menu Orientation
qê~åëáíáçå=jÉåì
Transition Menu Access Transition Rate Adjustment
Transition Curve Adjustment
5. Menu Orientation
5. Menu Orientation
qê~åëáíáçå=jÉåì=^ÅÅÉëë
qê~åëáíáçå=o~íÉ=^ÇàìëíãÉåí
FSN Series • User’s Guide • Rev
FSN Series • User’s Guide • Rev
qê~åëáíáçå=`ìêîÉ=^ÇàìëíãÉåí
5. Menu Orientation
Wipe Functions and Modifiers
Wipe Menu Access Wipe Patterns
táéÉ=jÉåì
5. Menu Orientation
táéÉ=cìåÅíáçåë=~åÇ=jçÇáÑáÉêë
táéÉ=jÉåì=^ÅÅÉëë
táéÉ=m~ííÉêåë
Bank Direction Edge Edge Color
5. Menu Orientation
_~åâ
aáêÉÅíáçå
FSN Series • User’s Guide • Rev
FSN Series • User’s Guide • Rev
5. Menu Orientation
Wipe Menu
FSN Series • User’s Guide • Rev
bÇÖÉ
5. Menu Orientation
FSN Series User’s Guide Rev
bÇÖÉ=`çäçê
5. Menu Orientation
Keyer Functions and Modifiers
Keyer Menu Access Keyer Status Table
hÉóÉê=jÉåì
Advanced Key Functions
5. Menu Orientation
hÉóÉê=jÉåì=^ÅÅÉëë
hÉóÉê=pí~íìë=q~ÄäÉ
FSN Series • User’s Guide • Rev
hÉóÉê=cìåÅíáçåë=~åÇ=jçÇáÑáÉêë
DVE Keyer Functions Swap Key Settings
External Key Copy Key Settings
hÉóÉê=pÉäÉÅíáçå
FSN Series • User’s Guide • Rev
qóéÉ
5. Menu Orientation
FSN Series • User’s Guide • Rev
`äáéI=d~áåI=lé~Åáíó
5. Menu Orientation
FSN Series • User’s Guide • Rev
hÉó=cáää
5. Menu Orientation
5. Menu Orientation
FSN Series • User’s Guide • Rev
FSN Series • User’s Guide • Rev
asb=hÉóÉê=cìåÅíáçåë
5. Menu Orientation
FSN Series • User’s Guide • Rev
pï~é=hÉó=pÉííáåÖë
5. Menu Orientation
FSN Series • User’s Guide • Rev
bñíÉêå~ä=hÉó
5. Menu Orientation
FSN Series • User’s Guide • Rev
`çéó=hÉó=pÉííáåÖë
5. Menu Orientation
^Çî~åÅÉÇ=hÉó=cìåÅíáçåë
~Key Type is reset to Luma
~Key Fill is reset to Self
5. Menu Orientation
FSN Series • User’s Guide • Rev
`çäçê=_~ÅâÖêçìåÇ=jÉåì
5. Menu Orientation
`çäçê=_~ÅâÖêçìåÇ=jÉåì=^ÅÅÉëë
To access the Color Background Menu
Color Wheel Fine Tuning User Colors
`çäçê=_~ÅâÖêçìåÇ=cìåÅíáçåë
5. Menu Orientation
`çäçê=tÜÉÉä
cáåÉ=qìåáåÖ
FSN Series • User’s Guide • Rev
5. Menu Orientation
rëÉê=`çäçêë
Learn
FSN Series • User’s Guide • Rev
FSN Series • User’s Guide • Rev
`çäçê=máÅâÉê=mçéJìé
5. Menu Orientation
jÉãçêó=jÉåì
•Memory Menu Access •Memory Menu Description
•Enables Menu Description •Selecting Registers
•Naming Registers •Advanced Memory Functions
FSN Series • User’s Guide • Rev
jÉãçêó=jÉåì= ÅÅÉëë
5. Menu Orientation
FSN Series • User’s Guide • Rev
jÉãçêó=jÉåì=aÉëÅêáéíáçå
5. Menu Orientation
5. Menu Orientation
FSN Series • User’s Guide • Rev
FSN Series • User’s Guide • Rev
bå~ÄäÉë=jÉåì=aÉëÅêáéíáçå
5. Menu Orientation
FSN Series • User’s Guide • Rev
•On the Enables Menu
5. Menu Orientation
bå~ÄäÉ=aÉëÅêáéíáçåë
M/E 1 and M/E 2 Enables PGM Enables
System Enables Aux Enables DVE Enables
jLb=N=~åÇ=jLb=O=bå~ÄäÉë
FSN Series • User’s Guide • Rev
mdj=bå~ÄäÉë
5. Menu Orientation
5. Menu Orientation
póëíÉã=bå~ÄäÉë
^ìñ=bå~ÄäÉë
FSN Series • User’s Guide • Rev
5. Menu Orientation
pÉäÉÅíáåÖ=oÉÖáëíÉêë
asb=bå~ÄäÉë
FSN Series • User’s Guide • Rev
k~ãáåÖ=oÉÖáëíÉêë
•Access the Pop-upKeyboard
~From the Enables Menu, press Description
•View Mode •Store Mode
içÅâáåÖ=~åÇ=råäçÅâáåÖ=oÉÖáëíÉêë
•From the Enables Menu, press Advanced
^Çî~åÅÉÇ=jÉãçêó=cìåÅíáçåë
aÉäÉíáåÖ=oÉÖáëíÉêë
FSN Series • User’s Guide • Rev
^ìñ=jÉåì
5. Menu Orientation
5. Menu Orientation
FSN Series • User’s Guide • Rev
Map Buttons Menu External DSK Setup Menu
System Menu Description Communications Setup Menu
Reference and Output Setup Menu Input Menu
Clean Feed Setup Menu Tally Setup Menu
póëíÉã=jÉåì=^ÅÅÉëë
System Menu Access System Menu Functions
póëíÉã=jÉåì=aÉëÅêáéíáçå
Status Tables Lock/Unlock Panel
•Tool Bar functions
•Setup Functions at the top of the Palette
póëíÉã=jÉåì=cìåÅíáçåë
5. Menu Orientation
5. Menu Orientation
FSN Series • User’s Guide • Rev
FSN Series • User’s Guide • Rev
pí~íìë=q~ÄäÉë
5. Menu Orientation
5. Menu Orientation
FSN Series • User’s Guide • Rev
FSN Series • User’s Guide • Rev
`çããìåáÅ~íáçåë=pÉíìé=jÉåì
5. Menu Orientation
FSN Series • User’s Guide • Rev
Discover FSN-1400
5. Menu Orientation
System Menu
5. Menu Orientation
192.168.0.4
FSN Series • User’s Guide • Rev
FSN Series • User’s Guide • Rev
oÉÑÉêÉåÅÉ=~åÇ=lìíéìí=pÉíìé=jÉåì
5. Menu Orientation
5. Menu Orientation
FSN Series • User’s Guide • Rev
FSN Series • User’s Guide • Rev
Reference Video and Timing
5. Menu Orientation
5. Menu Orientation
FSN Series • User’s Guide • Rev
FSN Series • User’s Guide • Rev
Output V-LockInformation
5. Menu Orientation
• • • • • • • •
fåéìí=jÉåì
5. Menu Orientation
FSN Series • User’s Guide • Rev
FSN Series • User’s Guide • Rev
oÉ~ê=fLl=sáÉï=aÉëÅêáéíáçå
5. Menu Orientation
Close
`çååÉÅíçê=`çäçêë
Info
5. Menu Orientation
FSN Series • User’s Guide • Rev
fåéìí=q~ÄäÉ=aÉëÅêáéíáçå
5. Menu Orientation
5. Menu Orientation
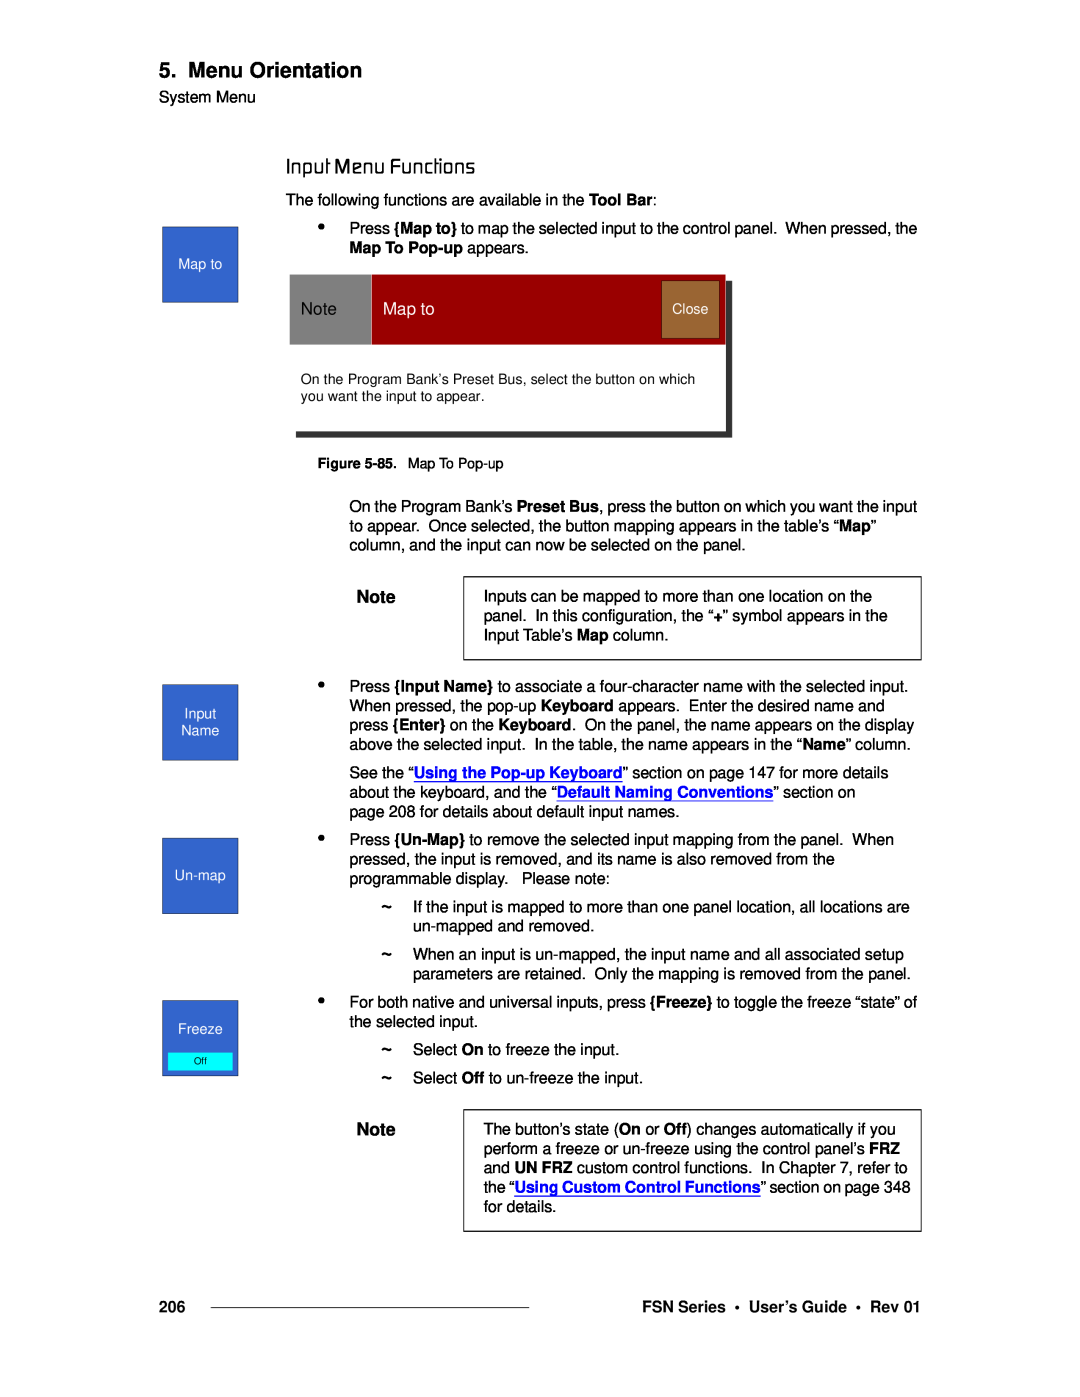
fåéìí=jÉåì=cìåÅíáçåë
Map to
FSN Series • User’s Guide • Rev
FSN Series • User’s Guide • Rev
Caution Refresh All Native Input Sync
5. Menu Orientation
FSN Series • User’s Guide • Rev
aÉÑ~ìäí=k~ãáåÖ=`çåîÉåíáçåë
5. Menu Orientation
•Input Sync Section •Understanding Sync Mode
fåéìí=pÉíìé=jÉåì=Ñçê=k~íáîÉ=fåéìíë
•Input Color Correction Section
•Input Mask Section
Default:
fåéìí=`çäçê=`çêêÉÅíáçå=pÉÅíáçå
Default: 100%
Default: 100%
5. Menu Orientation
fåéìí=póåÅ=pÉÅíáçå
råÇÉêëí~åÇáåÖ=póåÅ=jçÇÉ
FSN Series • User’s Guide • Rev
FSN Series • User’s Guide • Rev
5. Menu Orientation
System Menu
FSN Series • User’s Guide • Rev
fåéìí=j~ëâ=pÉÅíáçå
5. Menu Orientation
Input Sizing and Scaling Panel
fåéìí=pÉíìé=jÉåì=Ñçê=råáîÉêë~ä=fåéìíë
Input Capture and Process Panel
Input Color Correction Panel
•Input Capture and Timing Section
fåéìí=`~éíìêÉ=~åÇ=mêçÅÉëë=m~åÉä
fåéìí=`~éíìêÉ=~åÇ=qáãáåÖ=pÉÅíáçå
Input Processing Section
5. Menu Orientation
FSN Series • User’s Guide • Rev
5. Menu Orientation
FSN Series • User’s Guide • Rev
FSN Series • User’s Guide • Rev
fåéìí=mêçÅÉëëáåÖ=pÉÅíáçå
5. Menu Orientation
FSN Series • User’s Guide • Rev
fåéìí=páòáåÖ=~åÇ=pÅ~äáåÖ=m~åÉä
5. Menu Orientation
FSN Series • User’s Guide • Rev
5. Menu Orientation
System Menu
5. Menu Orientation
FSN Series • User’s Guide • Rev
FSN Series • User’s Guide • Rev
5. Menu Orientation
System Menu
fåéìí=`çäçê=`çêêÉÅíáçå=m~åÉä
fåéìí=pÉíìé=jÉåì=qççä=_~ê=cìåÅíáçåë
fåéìí=pÉíìé=kçíÉë
5. Menu Orientation
Map Buttons Keypad
j~é=_ìííçåë=jÉåì
Button Map Table Map Buttons Menu Functions
Mapping Luma Keys and Linear Keys
FSN Series • User’s Guide • Rev
_ìííçå=j~é=q~ÄäÉ
5. Menu Orientation
FSN Series • User’s Guide • Rev
j~é=_ìííçåë=jÉåì=cìåÅíáçåë
5. Menu Orientation
FSN Series • User’s Guide • Rev
j~é=_ìííçåë=hÉóé~Ç
5. Menu Orientation
FSN Series • User’s Guide • Rev
j~ééáåÖ=iìã~=hÉóë=~åÇ=iáåÉ~ê=hÉóë
5. Menu Orientation
bñíÉêå~ä=aph=pÉíìé=jÉåì
The External DSK Setup Menu is divided in half
External DSK Table DSK Cut Setup DSK Fill Setup
5. Menu Orientation
5. Menu Orientation
bñíÉêå~ä=aph=q~ÄäÉ
aph=`ìí=pÉíìé
FSN Series • User’s Guide • Rev
FSN Series • User’s Guide • Rev
aph=cáää=pÉíìé
5. Menu Orientation
`äÉ~å=cÉÉÇ=pÉíìé=jÉåì
The Clean Feed Setup Menu has two panels
Clean Feed Outputs Assign Button
`äÉ~å=cÉÉÇ=lìíéìíë
FSN Series • User’s Guide • Rev
^ëëáÖå=_ìííçå
5. Menu Orientation
5. Menu Orientation
SOn the Aux Output Row, select Aux
SOn the Aux Source Row, select ASSIGN
FSN Series • User’s Guide • Rev
5. Menu Orientation
Tally Table Tally Setup Menu Functions
q~ääó=pÉíìé=jÉåì
FSN Series • User’s Guide • Rev
FSN Series • User’s Guide • Rev
q~ääó=q~ÄäÉ
5. Menu Orientation
FSN Series • User’s Guide • Rev
q~ääó=pÉíìé=jÉåì=cìåÅíáçåë
5. Menu Orientation
FSN Series • User’s Guide • Rev
asb= ëëáÖå=jÉåì
5. Menu Orientation
FSN Series • User’s Guide • Rev
jìäíáîáÉïÉê=pÉíìé=jÉåì
5. Menu Orientation
Rear I/O View Description Aux Table Description
Aux Setup Menu Functions UOC Setup Menu
^ìñ=pÉíìé=jÉåì
5. Menu Orientation
5. Menu Orientation
^ìñ=q~ÄäÉ=aÉëÅêáéíáçå
oÉ~ê=fLl=sáÉï=aÉëÅêáéíáçå
FSN Series • User’s Guide • Rev
FSN Series • User’s Guide • Rev
^ìñ=pÉíìé=jÉåì=cìåÅíáçåë
5. Menu Orientation
Output Sizing and Scaling Panel
rl`=pÉíìé=jÉåì
Output and Process Panel
Output Color Correction Panel
lìíéìí=pÉÅíáçå
•Advanced UOC Output Setup Menu
lìíéìí=~åÇ=mêçÅÉëë=m~åÉä
•Output Section •Output Processing Section
5. Menu Orientation
lìíéìí=mêçÅÉëëáåÖ=pÉÅíáçå
lìíéìí=pí~íìë=pÉÅíáçå
FSN Series • User’s Guide • Rev
~CVBS ~Y/C ~SOG/Y ~CSync ~HV Sync
lìíéìí=~åÇ=mêçÅÉëë=qççä=_~ê=cìåÅíáçåë
~+H+V ~+H-V ~-H+V ~-H-V
5. Menu Orientation
FSN Series • User’s Guide • Rev
^Çî~åÅÉÇ=rl`=lìíéìí=pÉíìé=jÉåì
5. Menu Orientation
FSN Series • User’s Guide • Rev
5. Menu Orientation
System Menu
FSN Series • User’s Guide • Rev
lìíéìí=páòáåÖ=~åÇ=pÅ~äáåÖ=m~åÉä
5. Menu Orientation
5. Menu Orientation
FSN Series • User’s Guide • Rev
5. Menu Orientation
FSN Series • User’s Guide • Rev
FSN Series • User’s Guide • Rev
lìíéìí=`çäçê=`çêêÉÅíáçå=m~åÉä
5. Menu Orientation
FSN Series • User’s Guide • Rev
líÜÉê=pÉíìé=jÉåì
5. Menu Orientation
5. Menu Orientation
rëÉê=mêÉÑÉêÉåÅÉë=jÉåì
User Preferences Table User Preferences Functions
FSN Series User’s Guide Rev
rëÉê=mêÉÑÉêÉåÅÉë=q~ÄäÉ
rëÉê=mêÉÑÉêÉåÅÉë=cìåÅíáçåë
5. Menu Orientation
FSN Series • User’s Guide • Rev
FSN Series • User’s Guide • Rev
5. Menu Orientation
System Menu
T-Bar,Joystick and Knobs Calibrate Touch Screen
View Errors View Log
aá~ÖåçëíáÅë=jÉåì
LEDs, Buttons and Displays Tallies GPIO
FSN Series • User’s Guide • Rev
qJ_~êI=gçóëíáÅâ=~åÇ=håçÄë
5. Menu Orientation
5. Menu Orientation
FINE ADJUST and ENTER buttons on the Keypad
`~äáÄê~íÉ=qçìÅÜ=pÅêÉÉå
FSN Series • User’s Guide • Rev
FSN Series • User’s Guide • Rev
ibaëI=_ìííçåë=~åÇ=aáëéä~óë
5. Menu Orientation
FSN Series • User’s Guide • Rev
Button Test Mode
5. Menu Orientation
FSN Series User’s Guide Rev
q~ääáÉë
5. Menu Orientation
FSN Series • User’s Guide • Rev
dmfl
5. Menu Orientation
FSN Series User’s Guide Rev
sáÉï=bêêçêë
5. Menu Orientation
FSN Series • User’s Guide • Rev
Technical Support
5. Menu Orientation
FSN Series • User’s Guide • Rev
sáÉï=içÖ
5. Menu Orientation
5. Menu Orientation
FSN Series • User’s Guide • Rev
5. Menu Orientation
pçÑíï~êÉ=jÉåì
Software Table Software Functions
FSN Series • User’s Guide • Rev
5. Menu Orientation
pçÑíï~êÉ=q~ÄäÉ
pçÑíï~êÉ=cìåÅíáçåë
FSN Series • User’s Guide • Rev
FSN Series • User’s Guide • Rev
lìíéìí=qÉëí=m~ííÉêåë=jÉåì
5. Menu Orientation
5. Menu Orientation
FSN Series • User’s Guide • Rev
Panel is locked
içÅâLråäçÅâ=m~åÉä
p~îÉ=^ää=
Save All
FSN Series • User’s Guide • Rev
_~Åâìé=~åÇ=oÉëíçêÉ=jÉåì
5. Menu Orientation
FSN Series • User’s Guide • Rev
oÉëÉí=jÉåì
5. Menu Orientation
FSN Series • User’s Guide • Rev
c~Åíçêó=aÉÑ~ìäí=pÉííáåÖë
5. Menu Orientation
5. Menu Orientation
póëíÉã=pÜìíÇçïå
Caution System Shutdown
FSN Series • User’s Guide • Rev
FSN Series • User’s Guide • Rev
eÉäé=jÉåì=~åÇ=pÜçêíÅìíë
5. Menu Orientation
Help Menu and Shortcuts
pÜçêíÅìíë
5. Menu Orientation
FSN Series User’s Guide Rev
SK==póëíÉã=pÉíìé
Clean Feed Setup
Aux Setup Multiviewer Setup Tally Setup
• • • • • • • • • • • • • • • • • • • •
FSN Series User’s Guide Rev
6. System Setup
pÉíìé=mêÉêÉèìáëáíÉë
5.“Communications Setup,” page
1.“Power Up and Status Check,” page
2.“Return to Factory Default,” page
6.“Reference Video and Output Setup,” page
mçïÉê=ré=~åÇ=pí~íìë=`ÜÉÅâ
~ “Control Panel Installation,” page
~ “Touch Screen Installation,” page
~ “FSN-1400System Connections,” page
FSN Series User’s Guide Rev
oÉíìêå=íç=c~Åíçêó=aÉÑ~ìäí
6. System Setup
6. System Setup
Press Diags to display the Diagnostics Menu
qçìÅÜ=pÅêÉÉå=`~äáÄê~íáçå
FSN Series • User’s Guide • Rev
FSN Series • User’s Guide • Rev
`çããìåáÅ~íáçåë=pÉíìé
6. System Setup
FSN Series • User’s Guide • Rev
oÉëíçêáåÖ=íÜÉ=póëíÉã
6. System Setup
FSN Series • User’s Guide • Rev
oÉÑÉêÉåÅÉ=sáÇÉç=~åÇ=lìíéìí=pÉíìé
6. System Setup
6. System Setup
FSN Series • User’s Guide • Rev
6. System Setup
lìíéìí=qÉëí=m~ííÉêåë
a.Press Select All Outputs
FSN Series • User’s Guide • Rev
FSN Series • User’s Guide • Rev
`äÉ~å=cÉÉÇ=pÉíìé
6. System Setup
6. System Setup
2. Press Input Setup to display the Input Menu
k~íáîÉ=fåéìí=pÉíìé
FSN Series • User’s Guide • Rev
FSN Series • User’s Guide • Rev
6. System Setup
Native Input Setup
2. Press Input Setup to display the Input Menu
råáîÉêë~ä=fåéìí=pÉíìé
6. System Setup
FSN Series • User’s Guide • Rev
6. System Setup
FSN Series • User’s Guide • Rev
6. System Setup
FSN Series • User’s Guide • Rev
FSN Series • User’s Guide • Rev
bñíÉêå~ä=aph=fåéìí=pÉíìé
6. System Setup
Map Source/Cut. The Map Buttons Keypad appears
ìííçå=j~ééáåÖ
Press Map Buttons to display the Map Buttons Menu
6. System Setup
6. System Setup
Press Aux Setup to display the Aux Setup Menu
^ìñ=pÉíìé
FSN Series • User’s Guide • Rev
6. System Setup
FSN Series • User’s Guide • Rev
6. System Setup
FSN Series • User’s Guide • Rev
Layout Menu
jìäíáîáÉïÉê=pÉíìé
S Prerequisites —
6. System Setup
6. System Setup
FSN Series • User’s Guide • Rev
FSN Series • User’s Guide • Rev
q~ääó=pÉíìé
6. System Setup
Press Set Clock to display the Set Clock Keypad
rëÉê=mêÉÑÉêÉåÅÉë=pÉíìé
~ Set Black on Invalid Video on or off
Press Set Date to display the Set Date Keypad
_~ÅâáåÖ=ìé=íÜÉ=póëíÉã
Press Backup System to display the Backup Menu
p~îáåÖ=íÜÉ=pÉíìé
6. System Setup
6. System Setup
FSN Series • User’s Guide • Rev
• • • • • • • • • • • • • • • • • • • • • • • •
Quick Setup and Operations
TK==léÉê~íáçåë
Quick Function Reference
nìáÅâ=pÉíìé=~åÇ=léÉê~íáçåë
~Chapter 4, “Control Panel Installation,” page
~Chapter 4, “Touch Screen Installation,” page
7. Operations
7. Operations
FSN Series • User’s Guide • Rev
Quick Function Reference
nìáÅâ=cìåÅíáçå=oÉÑÉêÉåÅÉ
7. Operations
FSN Series • User’s Guide • Rev
• M/E Bank Rules
råÇÉêëí~åÇáåÖ=_ìííçå=`çäçê
•PGM Bank Rules
7. Operations
FSN Series • User’s Guide • Rev
råÇÉêëí~åÇáåÖ=pïáíÅÜÉê=i~óÉêë
7. Operations
7. Operations
FSN Series • User’s Guide • Rev
FSN Series • User’s Guide • Rev
råÇÉêëí~åÇáåÖ=cäáéJÑäçé=jçÇÉ
7. Operations
7. Operations
råÇÉêëí~åÇáåÖ=q~ääó
•Tally — PGM Bank
FSN Series • User’s Guide • Rev
FSN Series • User’s Guide • Rev
råÇÉêëí~åÇáåÖ=bêêçê=jÉëë~ÖÉë
7. Operations
7. Operations
tçêâáåÖ=ïáíÜ=mçéJìéë
rëáåÖ=íÜÉ=hÉóé~Ç
FSN Series • User’s Guide • Rev
FSN Series • User’s Guide • Rev
råÇÉêëí~åÇáåÖ=mêÉëë=~åÇ=eçäÇ
7. Operations
7. Operations
råÇÉêëí~åÇáåÖ=iççâ~ÜÉ~Ç=mêÉîáÉï
iççâ~ÜÉ~Ç=mêÉîáÉï=lîÉêîáÉï
FSN Series • User’s Guide • Rev
7. Operations
iççâ~ÜÉ~Ç=mêÉîáÉï=qìíçêá~ä
bñ~ãéäÉ=NW==_d=iççâ~ÜÉ~Ç
FSN Series • User’s Guide • Rev
7. Operations
Series
bñ~ãéäÉ=OW==hbv=N=iççâ~ÜÉ~Ç
FSN Series • User’s Guide • Rev
Series
bñ~ãéäÉ=PW==hbv=O=iççâ~ÜÉ~Ç
Series
7. Operations
Series
bñ~ãéäÉ=QW==_d=iççâ~ÜÉ~ÇI=qê~åëáíáçå=råÇÉê=hÉó
Series
7. Operations
Series
bñ~ãéäÉ=RW==`çãÄáåÉÇ=iççâ~ÜÉ~Ç
bñ~ãéäÉ=SW==`çåíáåìÉÇ=mê~ÅíáÅÉ
7. Operations
^ìíçã~íáÅ=qê~åëáíáçåë
råÇÉêëí~åÇáåÖ=íÜÉ=qJ_~ê=~åÇ=qê~åëáíáçå=ibaë
j~åì~ä=qê~åëáíáçåë
Manual Transitions Automatic Transitions
7. Operations
mÜóëáÅ~ä=~åÇ=sáêíì~ä=qJ_~ê=mçëáíáçå
bñ~ãéäÉ=NW==kçêã~ä=qJ_~ê=ãçîÉãÉåí
FSN Series • User’s Guide • Rev
7. Operations
qê~åëáíáçå=iba=kçíÉë
bñ~ãéäÉ=OW==qJ_~ê=ãçîÉãÉåí=ïáíÜ=ãÉãçêó=êÉÖáëíÉêë
FSN Series • User’s Guide • Rev
FSN Series • User’s Guide • Rev
rëáåÖ=oÉJÉåíêó
7. Operations
7. Operations
tçêâáåÖ=ïáíÜ=`ìíë
1.In the Next Transition Group, press BG
FSN Series • User’s Guide • Rev
FSN Series • User’s Guide • Rev
pÉííáåÖ=qê~åëáíáçå=o~íÉë=~åÇ=`ìêîÉë
7. Operations
^ìíçã~íáÅ=jáñ
tçêâáåÖ=ïáíÜ=jáñÉë
j~åì~ä=jáñ
•Manual Mix •Automatic Mix
táéÉ=pÉíìé
•Wipe Setup •Manual Wipe •Automatic Wipe
tçêâáåÖ=ïáíÜ=táéÉë
j~åì~ä=táéÉ
SPrerequisites
Key Setup Manual Mix Key Automatic Mix Key
tçêâáåÖ=ïáíÜ=hÉóë
Manual Wipe Key Automatic Wipe Key
7. Operations
hÉó=pÉíìé
4.On the Keyer Menu
FSN Series • User’s Guide • Rev
j~åì~ä=táéÉ=hÉó
j~åì~ä=jáñ=hÉó
^ìíçã~íáÅ=jáñ=hÉó
3.Press AUTO TRAN
7. Operations
^ìíçã~íáÅ=táéÉ=hÉó
aáêÉÅí=`çåíêçä=hÉóë
4.Press AUTO TRAN
•Memory Register Overview
tçêâáåÖ=ïáíÜ=jÉãçêó=oÉÖáëíÉêë
jÉãçêó=oÉÖáëíÉê=lîÉêîáÉï
•Storing Memory Registers
•DVE Memory Functions
•M/E Memory Functions
•Aux Memory Functions
•System Memory Functions
7. Operations
píçêáåÖ=jÉãçêó=oÉÖáëíÉêë
píçêÉI= óé~ëë=bå~ÄäÉëI=rëÉ=aÉÑ~ìäí=k~ãÉ
• • • •
6.Press Description to display the Pop-upKeyboard
píçêÉI=_óé~ëë=bå~ÄäÉëI=båíÉê=`ìëíçã=k~ãÉ
píçêÉI=pÉí=bå~ÄäÉëI=båíÉê=`ìëíçã=k~ãÉ
7. Operations
FSN Series • User’s Guide • Rev
jÉãçêó=píçêÉ=kçíÉë
7. Operations
oÉÅ~ääI=_óé~ëë=bå~ÄäÉë
Recall, Bypass Enables Recall, Adjust Enables
oÉÅ~ääáåÖ=jÉãçêó=oÉÖáëíÉêë
oÉÅ~ääI=^Çàìëí=bå~ÄäÉë
FSN Series • User’s Guide • Rev
jÉãçêó=oÉÅ~ää=kçíÉë
7. Operations
7. Operations
sáÉïáåÖ=jÉãçêó=oÉÖáëíÉêë
içÅâáåÖ=~åÇ=råäçÅâáåÖ=jÉãçêó=oÉÖáëíÉêë
FSN Series • User’s Guide • Rev
FSN Series • User’s Guide • Rev
aÉäÉíáåÖ=jÉãçêó=oÉÖáëíÉêë
7. Operations
SPrerequisites
tçêâáåÖ=ïáíÜ=^ìñ=_ìëÉë
7. Operations
FSN Series • User’s Guide • Rev
SPrerequisites
pÉäÉÅíáåÖ=`äÉ~å=cÉÉÇ=lìíéìíë
7. Operations
FSN Series • User’s Guide • Rev
FSN Series • User’s Guide • Rev
rëáåÖ=`ìëíçã=`çåíêçä=cìåÅíáçåë
7. Operations
SPrerequisites
jLb=O=`çåíêçä=çå=íÜÉ=cpkJNRM
7. Operations
FSN Series • User’s Guide • Rev
_~ÅâáåÖ=ré=íÜÉ=póëíÉã
4.Press Backup System to display the Backup Menu
_~ÅâáåÖ=ré=~åÇ=oÉëíçêáåÖ=íÜÉ=póëíÉã
Backing Up the System Restoring the System
7. Operations
4.Press Restore System to display the Backup Menu
oÉëíçêáåÖ=íÜÉ=póëíÉã
FSN Series • User’s Guide • Rev
7. Operations
FSN Series • User’s Guide • Rev
få=qÜáë=`Ü~éíÉê
UK==asb=léÉê~íáçåë
Automatic DVE Triggering
• • • • • • •
8. DVE Operations
fåíêçÇìÅíáçå=íç=íÜÉ=asb
asb=tçêâÑäçï=lîÉêîáÉï
DVE Coordinate Space Joystick Control
•DVE Channel Assignment
•DVE Effects Setup
asb=jçÇÉë=~åÇ=cÉ~íìêÉë
•Keyer Mode
•Shot Box
•Adjustable PIP Size and Position
•Adjustable Mask
•Link Mode
•Adjustable Image Effects
•Adjustable Color Effects
•Adjustable Image Processing
jìäíáéäÉ=t~óë=íç=qêáÖÖÉê
8. DVE Operations
mdj=_~åâ=qêáÖÖÉêë
~Press AUTO TRAN
FSN Series • User’s Guide • Rev
8. DVE Operations
asb=bÑÑÉÅí=aìê~íáçåë
asb=jçêéÜáåÖ
FSN Series • User’s Guide • Rev
FSN Series • User’s Guide • Rev
asb=`ççêÇáå~íÉ=pé~ÅÉ
8. DVE Operations
FSN Series • User’s Guide • Rev
gçóëíáÅâ=`çåíêçä
8. DVE Operations
DVE Assign Menu
Effect Setup Panel Pan Zoom Source Panel
asb=jÉåì=lêáÉåí~íáçå
DVE Main Menu — Size and Position Panel
FSN Series • User’s Guide • Rev
asb=^ëëáÖå=jÉåì
8. DVE Operations
FSN Series • User’s Guide • Rev
8. DVE Operations
DVE Menu Orientation
FSN Series • User’s Guide • Rev
asb=j~áå=jÉåì=Ô=páòÉ=~åÇ=mçëáíáçå=m~åÉä
8. DVE Operations
Functional Tabs DVE Status Table
`çããçå=asb=jÉåì=`çãéçåÉåíë
cìåÅíáçå~ä=q~Äë
Keyframe Editing Section Tool Bar Functions
Live Effect KF Shot Box KF
asb=pí~íìë=q~ÄäÉ
hÉóÑê~ãÉ=bÇáíáåÖ=pÉÅíáçå
8. DVE Operations
FSN Series • User’s Guide • Rev
qççä=_~ê=cìåÅíáçåë
8. DVE Operations
8. DVE Operations
páòÉ=~åÇ=mçëáíáçå=^ÇàìëíãÉåíë
páòÉ=mêÉëÉíë
FSN Series User’s Guide Rev
8. DVE Operations
mçëáíáçå=mêÉëÉíë
^ëéÉÅí=o~íáç
FSN Series • User’s Guide • Rev
FSN Series User’s Guide Rev
j~åì~ä=páòÉ=~åÇ=mçëáíáçå
8. DVE Operations
FSN Series • User’s Guide • Rev
bÑÑÉÅí=pÉíìé=m~åÉä
8. DVE Operations
FSN Series • User’s Guide • Rev
m~å=wççã=pçìêÅÉ=m~åÉä
8. DVE Operations
FSN Series • User’s Guide • Rev
8. DVE Operations
DVE Menu Orientation
FSN Series • User’s Guide • Rev
j~ëâ=m~åÉä
8. DVE Operations
DVE Menu Orientation
PIP or key
8. DVE Operations
FSN Series • User’s Guide • Rev
8. DVE Operations
_çêÇÉê=pÜ~Ççï=lé~Åáíó=m~åÉä
Border Section Shadow Section Opacity Section
• • •
FSN Series • User’s Guide • Rev
_çêÇÉê=pÉÅíáçå
8. DVE Operations
FSN Series • User’s Guide • Rev
pÜ~Ççï=pÉÅíáçå
8. DVE Operations
FSN Series • User’s Guide • Rev
lé~Åáíó=pÉÅíáçå
8. DVE Operations
FSN Series User’s Guide Rev
pÜçí=_çñ=jÉåì
8. DVE Operations
FSN Series • User’s Guide • Rev
Box KF field
8. DVE Operations
FSN Series • User’s Guide • Rev
^Çî~åÅÉÇ=asb=jÉåì=Ô=`çäçê=bÑÑÉÅíë=m~åÉä
8. DVE Operations
FSN Series • User’s Guide • Rev
8. DVE Operations
DVE Menu Orientation
8. DVE Operations
^Çî~åÅÉÇ=asb=jÉåì=Ô=asb=bñíê~ë=m~åÉä
Notes
FSN Series • User’s Guide • Rev
FSN Series • User’s Guide • Rev
8. DVE Operations
DVE Menu Orientation
FSN Series • User’s Guide • Rev
hÉóÑê~ãÉ=cêÉÉòÉ=_ÉÜ~îáçê
8. DVE Operations
FSN Series • User’s Guide • Rev
asb=iáåâë
8. DVE Operations
FSN Series • User’s Guide • Rev
^ëëáÖåáåÖ=asb=`Ü~ååÉäë=íç=hÉóÉêë
8. DVE Operations
FSN Series User’s Guide Rev
pÉäÉÅíáåÖ=íÜÉ=hÉóÉê=jçÇÉ
8. DVE Operations
Programming Single Keyframe Effects
mêçÖê~ããáåÖ=asb=bÑÑÉÅíë
mêçÖê~ããáåÖ=páåÖäÉ=hÉóÑê~ãÉ=bÑÑÉÅíë
Programming Dual Keyframe Effects
8. DVE Operations
mêçÖê~ããáåÖ=aì~ä=hÉóÑê~ãÉ=bÑÑÉÅíë
a.Press Shot Box to display the Shot Box Menu
a.Press Shot Box to display the Shot Box Menu
5.Press Shot Box to display the Shot Box Menu
`êÉ~íáåÖ=aì~ä=hÉóÑê~ãÉ=bÑÑÉÅíë=Ñêçã=íÜÉ=pÜçí=_çñ
2.Press Shot Box to display the Shot Box Menu
8. DVE Operations
Effect KF
bÇáíáåÖ=hÉóÑê~ãÉë
Live
Shot Box KF
8. DVE Operations
FSN Series User’s Guide Rev
8. DVE Operations
^ìíçã~íáÅ=asb=qêáÖÖÉêáåÖ=
Automatic DVE Trigger Rules
• • • • •
FSN Series • User’s Guide • Rev
^ìíçã~íáÅ=qêáÖÖÉêáåÖ=îá~=íÜÉ=`çåíêçä=m~åÉä=
8. DVE Operations
qêáÖÖÉê=låäó=qê~åëáíáçå
•Enable FX TRIG by itself in the Effects Group
qêáÖÖÉê=pÉíìé=~åÇ=aáëéä~ó
8. DVE Operations
jáñJâÉóJíêáÖÖÉê=qê~åëáíáçå
•Enable MIX and FX TRIG in the Effects Group
•Enable WIPE and FX TRIG in the Effects Group
táéÉJâÉóJíêáÖÖÉê=qê~åëáíáçå
FSN Series • User’s Guide • Rev
^ìíçã~íáÅ=asb=qêáÖÖÉê=oìäÉë
8. DVE Operations
• • • • • • • • • • •
rëáåÖ=^ìíçã~íáÅ=asb=qêáÖÖÉêë=
qêáÖÖÉê=~å=bÑÑÉÅí=çå=hÉóÉê=N=låäó
Trigger an Effect on Keyer 1 Only
1.In the Next Transition Group, press KEY
qêáÖÖÉê=~å=bÑÑÉÅí=çå=hÉóÉê=O=låäó
qêáÖÖÉê=bÑÑÉÅíë=çå=ÄçíÜ=hÉóÉêë
8. DVE Operations
8. DVE Operations
jáñ=hÉó=~åÇ=qêáÖÖÉê=~å=bÑÑÉÅí=çå=hÉóÉê=N
jáñ=hÉó=~åÇ=qêáÖÖÉê=~å=bÑÑÉÅí=çå=hÉóÉê=O
1.In the Next Transition Group, press KEY
8. DVE Operations
jáñ=hÉó=~åÇ=qêáÖÖÉê=bÑÑÉÅíë=çå=ÄçíÜ=hÉóÉêë
jáñ=_d=~åÇ=hÉóÉê=NI=~åÇ=qêáÖÖÉê=bÑÑÉÅí=çå=hÉóÉê=N
FSN Series • User’s Guide • Rev
FSN Series • User’s Guide • Rev
jáñ=_d=~åÇ=hÉóÉê=OI=~åÇ=qêáÖÖÉê=bÑÑÉÅí=çå=hÉóÉê=O
8. DVE Operations
FSN Series • User’s Guide • Rev
táéÉ=qêáÖÖÉê=léíáçåë
8. DVE Operations
•Tap In, Tap Out Rules •Tap in, Tap Out Examples
q~é=fåI=q~é=lìí=cìåÅíáçåë
q~é=fåI=q~é=lìí=oìäÉë
8. DVE Operations
Mix KEY 1 and trigger KEY
q~é=áåI=q~é=lìí=bñ~ãéäÉë=
jáñ=hbv=N=~åÇ=íêáÖÖÉê=hbv=O
~In the Effects Group, press MIX and FX TRIG
~In the Effects Group, press WIPE and FX TRIG
jáñ=_dI=íêáÖÖÉê=hbv=NI=ãáñJâÉóJíêáÖÖÉê=hbv=O
táéÉJâÉóJíêáÖÖÉê=hbv=NI=ïáéÉ=hbv=O
8. DVE Operations
8. DVE Operations
FSN Series • User’s Guide • Rev
•Introduction to the Multiviewer
•Multiviewer Menu Orientation •Multiviewer Setup
VK==jìäíáîáÉïÉê=léÉê~íáçåë
•Multiviewer Memory
FSN Series • User’s Guide • Rev
fåíêçÇìÅíáçå=íç=íÜÉ=jìäíáîáÉïÉê
9. Multiviewer Operations
9. Multiviewer Operations
FSN Series User’s Guide Rev
Select Colors Menu Clock Setup Menu
Multiviewer Setup Menu
Multiviewer Output Setup Menu Select Layout Menu
jìäíáîáÉïÉê=jÉåì=lêáÉåí~íáçå
FSN Series • User’s Guide • Rev
jìäíáîáÉïÉê=pÉíìé=jÉåì
9. Multiviewer Operations
FSN Series • User’s Guide • Rev
9. Multiviewer Operations
Multiviewer Menu Orientation
FSN Series • User’s Guide • Rev
jìäíáîáÉïÉê=lìíéìí=pÉíìé=jÉåì
9. Multiviewer Operations
FSN Series • User’s Guide • Rev
pÉäÉÅí=i~óçìí=jÉåì
9. Multiviewer Operations
9. Multiviewer Operations
FSN Series • User’s Guide • Rev
FSN Series • User’s Guide • Rev
pÉäÉÅí=`çäçêë=jÉåì
9. Multiviewer Operations
FSN Series • User’s Guide • Rev
`äçÅâ=pÉíìé=jÉåì
9. Multiviewer Operations
FSN Series User’s Guide Rev
^ëëáÖå=pçìêÅÉ=hÉóé~Ç
9. Multiviewer Operations
9. Multiviewer Operations
jìäíáîáÉïÉê=jÉãçêó
jìäíáîáÉïÉê=pÉíìé
FSN Series • User’s Guide • Rev
9. Multiviewer Operations
FSN Series • User’s Guide • Rev
NMK==réÇ~íáåÖ=pçÑíï~êÉ
Software Update Overview Hardware Requirements
Updating FSN-1400Software Conditional Updates
Downloading Software
10. Updating Software
pçÑíï~êÉ=réÇ~íÉ=lîÉêîáÉï
e~êÇï~êÉ=oÉèìáêÉãÉåíë
6.Press Software to display the Software Menu
Via FTP Site Via Web Site
açïåäç~ÇáåÖ=pçÑíï~êÉ
sá~=cqm=páíÉ
Windows Explorer
10. Updating Software
sá~=tÉÄ=páíÉ
6.Click the Folsom Image Processing tab
FSN_revision #.tar.gz
10. Updating Software
réÇ~íáåÖ=`çåíêçä=m~åÉä=pçÑíï~êÉ
5.Press Software to display the Software Menu
FSN Series • User’s Guide • Rev
`çåÇáíáçå~ä=réÇ~íÉë
3.Press Update FSN-1400
réÇ~íáåÖ=cpkJNQMM=pçÑíï~êÉ
~Press Software to display the Software Menu
Reference Video Output Specifications
System Specifications Overview
Reference Video Input Specifications
Physical and Electrical Specifications
FSN Series • User’s Guide • Rev
póëíÉã=péÉÅáÑáÅ~íáçåë=lîÉêîáÉï
^K==péÉÅáÑáÅ~íáçåë
FSN Series • User’s Guide • Rev
oÉÑÉêÉåÅÉ=sáÇÉç=fåéìí=péÉÅáÑáÅ~íáçåë
^K==péÉÅáÑáÅ~íáçåë
FSN Series • User’s Guide • Rev
oÉÑÉêÉåÅÉ=sáÇÉç=lìíéìí=péÉÅáÑáÅ~íáçåë
^K==péÉÅáÑáÅ~íáçåë
cpkJNRM
mÜóëáÅ~ä=~åÇ=bäÉÅíêáÅ~ä=péÉÅáÑáÅ~íáçåë=
cpkJNQMM
^K==péÉÅáÑáÅ~íáçåë
^K==péÉÅáÑáÅ~íáçåë
qçìÅÜ=pÅêÉÉå=aáëéä~ó
qçìÅÜ=pÅêÉÉå=aáëéä~ó=pí~åÇ
FSN Series • User’s Guide • Rev
`~ÄäÉ=péÉÅáÑáÅ~íáçåë=
`çããìåáÅ~íáçåë=péÉÅáÑáÅ~íáçåë=
^ÖÉåÅó=péÉÅáÑáÅ~íáçåë=
^K==péÉÅáÑáÅ~íáçåë
rf`=aÉä~ó
aÉä~ó=péÉÅáÑáÅ~íáçåë
kf`=aÉä~ó
NIC Delay UIC Delay
Tally Connector GPIO Connector
Analog 15-pinD Connector DVI-IConnector
Ethernet Connector Serial Connectors
máåçìíë=
^K==péÉÅáÑáÅ~íáçåë
asfJf=`çååÉÅíçê
The figure below illustrates the DVI-Iconnector
Pinouts
FSN Series • User’s Guide • Rev
bíÜÉêåÉí=`çååÉÅíçê
^K==péÉÅáÑáÅ~íáçåë
FSN Series • User’s Guide • Rev
pÉêá~ä=`çååÉÅíçêë
^K==péÉÅáÑáÅ~íáçåë
FSN Series • User’s Guide • Rev
q~ääó=`çååÉÅíçê
^K==péÉÅáÑáÅ~íáçåë
The table below lists GPIO connector pinouts
dmfl=`çååÉÅíçê
The figure below illustrates the GPIO connector
^K==péÉÅáÑáÅ~íáçåë
UIC Input and UOC Output Formats
fåéìí=~åÇ=lìíéìí=cçêã~í=q~ÄäÉë
rf`=fåéìí=~åÇ=rl`=lìíéìí=cçêã~íë
NIC Input Formats, UIC Input Formats BNC
Format
^K==péÉÅáÑáÅ~íáçåë
FSN Series • User’s Guide • Rev
Color Space
^K==péÉÅáÑáÅ~íáçåë
FSN Series • User’s Guide • Rev
Format
^K==péÉÅáÑáÅ~íáçåë
FSN Series • User’s Guide • Rev
Color Space
^K==péÉÅáÑáÅ~íáçåë
kf`=fåéìí=cçêã~íëI=rf`=fåéìí=cçêã~íë=E_k`F
lìíéìí=cçêã~íë
FSN Series • User’s Guide • Rev
^K==péÉÅáÑáÅ~íáçåë
FSN Series User’s Guide Rev
t~êê~åíó
Warranty Return Material Authorization RMA
_K==`çåí~Åí=fåÑçêã~íáçå
oÉíìêå=j~íÉêá~ä=^ìíÜçêáò~íáçå=Eoj^F
Sales Contact Information
`çåí~Åí=fåÑçêã~íáçå
_K==`çåí~Åí=fåÑçêã~íáçå
Technical Support Information
FSN Series • User’s Guide • Rev
fåÇÉñ
pçÑíâÉóë=~åÇ=póãÄçäë
Index
FSN Series • User’s Guide • Rev
Index
FSN Series • User’s Guide • Rev
FSN Series • User’s Guide • Rev
kìãÉêáÅë
Index
Index
FSN Series • User’s Guide • Rev
FSN Series • User’s Guide • Rev
setup menu
Index
Index
FSN Series • User’s Guide • Rev
Index
FSN Series • User’s Guide • Rev
Index
FSN Series • User’s Guide • Rev
Index
FSN Series • User’s Guide • Rev
Index
FSN Series • User’s Guide • Rev
Index
FSN Series User’s Guide Rev
Index
FSN Series • User’s Guide • Rev
FSN Series • User’s Guide • Rev
Index
SYS module
Index
FSN Series • User’s Guide • Rev
Index
FSN Series • User’s Guide • Rev
Index
FSN Series • User’s Guide • Rev
FSN Series • User’s Guide • Rev
Index
shot box keyframe
Index
FSN Series • User’s Guide • Rev
Index
FSN Series • User’s Guide • Rev
Index
FSN Series • User’s Guide • Rev
X-AxisControl, Joystick
XLR Connector, script lights
Index
FSN Series • User’s Guide • Rev